


As a marketer I’m often found talking about the intricacies of Google’s search algorithm and how to get your website discovered and ranked highly in the search results. What I’m not usually talking about is the other search engines you might encounter when promoting your business.
The truth is, while Google dominates the market for web search – with Bing close behind – there are other search engines of equal or greater importance for some businesses. For example, if you’re trying to grow a YouTube channel, knowing the ins and outs of YouTube’s search is crucial.
Likewise, there are other search engines you want to use to promote yourself. One such search engine is Apple’s search, which searches through the Apple App Store. This primary concerns people advertising iOS apps, but might also be of value to anyone with a Mac app of any sort, or anything found on iTunes, like podcasts.
Enter: Apple Search Ads
Rather than rely on organic search here, I’m going to dive right into the paid side of things. Stay tuned; I might put out a post on the organic side later. For now, though, let’s talk about Apple Search Ads.
Apple Search Ads are basically promoted app listings that appear when a user searches the Apple App Store. Since people aren’t usually searching the app store for no reason, these ads can be very potent.
Think about it; the kinds of people searching the App Store are most likely looking for something specific. If they aren’t looking for an app by name, they’re looking for something to solve a problem. If you can show them your app at just the right time, you can get them to purchase it, or download it and potentially upgrade later, or make in-app purchases down the road. Discovery is the key, and it’s almost essential for any modern iOS developer to set aside a budget for Apple Search Ads.
Limitations on Apple Search Ads
Apple Search Ads are not without their drawbacks. For one thing, they only appear in the Apple App Store search results page. They do not appear on related searches, through third party listings, or other locations.
Another key restriction is that the Apple Search Ad format is solely about promoting iOS apps. If you have a non-iOS app for Mac, or you have a website you want to promote, you can’t do it through this ad format. You’ll be better off paying for ads in other venues for that kind of exposure.
Apple Search Ads are also a relatively new product. They were released in 2016 for a North American user base, and expanded to the UK, Australia, and New Zealand in 2017. As such, they aren’t the most refined ads system, and they might not function precisely how you expect them to function if you’re an experienced marketer.
Apple Search Ads are only available to Apple IDs that have a valid email address attached to them. Phone number only accounts are not eligible. Additionally, Apple Search Ads are only available in specific countries. You can see the full list of countries here.
Benefits of Apple Search Ads
At the same time, Apple Search Ads have a number of tangible benefits.
First and foremost among them is the extremely narrow audience. Apple Search Ads are 100% targeted to people searching the Apple App Store for something, which is a relatively small segment of the population. However, they are all already basically pre-qualified leads. Everyone searching the app store – more or less – is going to have an iOS device and is going to be looking for something to install on that device.
![]()
Now, that’s not 100% of the audience. I’ve known people who don’t have Apple devices who still search the App Store for one reason or another. They might be writers gathering information for articles, or they might be Android users looking to see if their favorite apps have analogues, or what have you. As with any ads system, you’re going to have some level of audience that isn’t engaged with their search.
That said, the Apple App Store audience is actually a very good audience to target. Studies have shown that iOS users tend to spend more on apps and on in-app purchases than an Android audience.
Convinced? If you have an iOS app and you want to promote it to an audience to get more sales or more in-app purchases, this is one of the best ads systems you can use.
Two Types of Apple Search Ads
Unlike most ads systems, where all of the features are available to you as long as you know how to use them, Apple Search Ads has two different levels of access: Basic and Advanced.
Apple Search Ads Basic is, well, the basic version of Apple Search Ads. It’s meant for beginners, small studios, and people who don’t have a huge budget to spend on advertising. Small and mid-sized businesses, individuals, and other small entities should use this package.

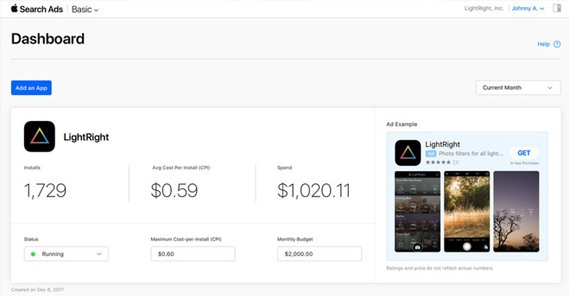
Basic is a simple platform with minimal management required. It’s simple to set up and get running in a minimal amount of time. You pay per app install, and you set the target cost per install you want to reach. Apple has some level of intelligent automation to create and manage these ads for you, to maximize your chances of success.
Additionally, all new accounts with Apple Search Ads Basic start with a free $100 in ads credit, so you can do a trial run and see how it works without risking your own money.
So what’s the downside? Basic does not have any sort of keyword or audience targeting options you can control. It’s all reliant on Apple’s automation, which means you can’t use any clever tricks to get ahead of your competition. You’re also limited in the number of apps you can promote on one account. That limit is relatively high, though: it’s 50 apps on one account. You’re also limited to just the Attribution API and not additional data or management API access.
Perhaps the single biggest limitation for some mid-sized businesses is the budget restriction. Basic restricts you to a maximum of $10,000 per month per app. If you need to spend a higher budget than that, you will have to use Advanced.
Apple Search Ads Advanced is the more advanced version of Apple Search Ads. It has some additional features, but isn’t quite as user-friendly as the Basic version. It’s a bit more like a traditional ad network. It’s more complex and more time-consuming to manage, because much of the automation present in Basic is missing from Advanced in favor of more user control.
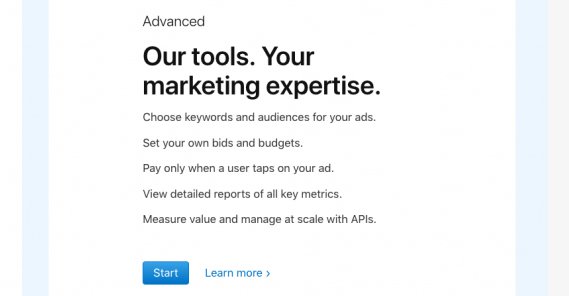
Advanced adds the ability to refine and target your ads based on search match, keywords you specify, some customer data such as users of your other apps or existing customers, some demographic information like gender and age range, device information (like iPad versus iPhone), and location data.
The Advanced ads version also gives you greater access to the data APIs, which can be relevant if you’re an agency or if you’re a huge business and want to manage bulk ads more easily.
Advanced removes limitations from Basic: you do not have an app limit or a budget limit. However, it also removes the new account credit, so you don’t get that free $100. I suppose if you’re planning to be spending well over $10,000 per app per month, though, a one-time $100 doesn’t mean much.
Which version should you use? I recommend always going for Basic if you can, unless you’re in an extremely competitive niche and need the edge that advanced targeting will give you, or if you’re intending to advertise with a much higher budget, or if you have a wide variety of apps to advertise. So basically, Agencies and large businesses should use Advanced, while everyone else can probably make do with Basic.
Setting Up an Apple Search Ads Account
If you’re convinced and you want to start advertising with Apple Search Ads, it’s a surprisingly easy process.
The first thing you need to do is make sure you’re eligible:
- Make sure your Apple ID has a valid and accurate email address attached to it. Phone number only accounts are not eligible.
- Make sure you have an iOS app already uploaded to the app store. You cannot sign up for Search Ads without already having an app available to advertise.
- Make sure you’re in one of the countries where you’re allowed to access the Apple Search Ads system. The list of countries is here.
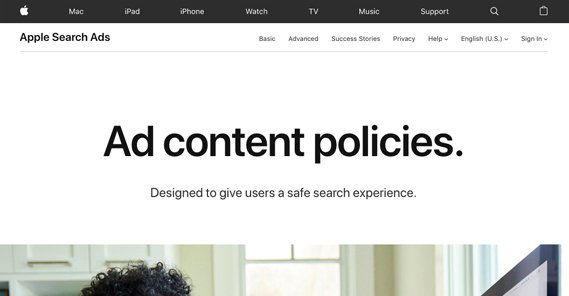
- Make sure that you’re in compliance with the Apple Ad Content Policies. This is mostly the usual stuff: no trademark violations, no misleading apps, no illegal content, no adult content, nothing discriminatory, and so on. Read it over and make sure you don’t violate any of the terms.
Additionally, some regions may have specific restrictions that are not applicable to all regions. For example, gambling content is illegal in Italy, so if you’re based in Italy, you can’t advertise your casino app. Alcohol-related content can only be advertised to users above the requisite age and in countries that don’t restrict it. You know, those kinds of restrictions.
Once you have made sure you are eligible to sign up for Apple Search Ads, you will want to visit their homepage, here. Simply click that link.
On hat page, click the Get Started, which will scroll you down to the descriptions of both Basic and Advanced. I’m assuming you’re going to be using Basic – since most people should – so click Start under the Basic section.
Note: You can actually sign up for and use both Basic and Advanced at the same time. I’m not really sure why you would want to do this, but Apple allows it.
Once you have clicked the Start button, you will need to sign in with your Apple ID. If you don’t have one, you’ll need to create one, though I’m not really sure how you got the iOS Dev Kit or uploaded an iOS app for sale if you don’t have an Apple ID.
Note that the Apple ID you choose needs to be the one that is connected to your App Store Connect account. You will need to choose your App Store Connect account and link them up later if you haven’t already.
Apple will ask you to choose your preferred language and date/time format, so make those selections.
Next, you will need to fill out your basic information. This includes your account name, your country or region, your time zone, your preferred currency, and your primary contact information. Fill this out and submit.
Accept the Apple Search Ads Terms of Service, which you can read here if you desire.
Next, you will need to fill out the relevant business information necessary to run ads. This is mostly just your tax information.
Finally, choose your contact preference and then click “create account” to get your account started.
Once your account is configured, you will need to add a credit card to your profile. This is required to start running ads, because you need to be able to pay for them. Billing occurs every $500 spent or every 7 days, whichever comes first.
Using the Apple Search Ads Program
Once you have your account set up and linked to your Apple ID and App Store Connect accounts, you should be able to start running ads. If you’re having trouble, make sure your account is set up as either a Legal Account Holder, App Manager, Admin, or Marketer. These are similar to Facebook Page Roles within the Apple system.
To promote an app, simply choose the app you want to promote from your apps list. Once chosen, select the countries and regions you want to promote in. Add in your monthly budget, up to a maximum of $10,000 per month per app. Decide on your maximum cost per install and plug it in. Once you have all of this information submitted, Apple will start running ads for you.
Once the ads are running, you can check reports at any time, change your budget at any time, and cancel ads at any time.
The post A Beginner’s Guide to Promoting on Apple Search Ads appeared first on Growtraffic Blog.
Source: Grow Traffic News feed