Do you want to add custom after post widgets in WordPress?
After post widgets allow you to display different elements at the end of blog posts or pages. For instance, you can add a newsletter sign-up form, show related posts, display recent articles, or popular products.
In this article, we’ll show you how to easily add custom after post widgets in WordPress to keep users engaged and spend more time on your website.
Why Add Custom After Post Widgets in WordPress
You may have seen call to actions at the end of an article on many popular websites. That’s because if a user has scrolled down till the end of an article, then they are already hooked and more likely to engage with your offer.
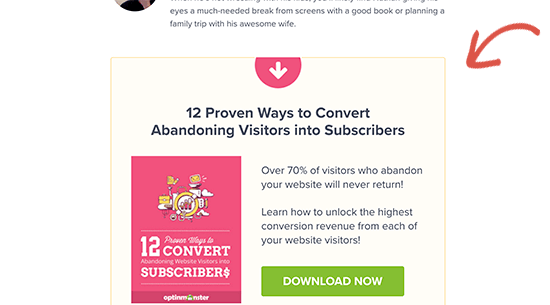
This space can be utilized to put an email sign-up form, a lead generation form, or boost user engagement with related posts, popular posts, and other content discovery features.
Similarly, if you run an online store, then you may want to show related products or promote a sale by offering a discount.
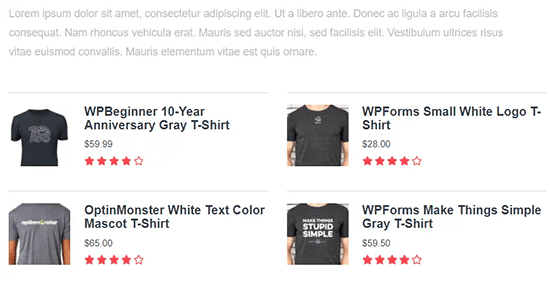
Now there are different ways to do this. You could use plugins like MonsterInsights popular posts addon which lets you automatically add popular posts or popular products after your post content.
You can add that after-post content manually while writing your posts using the block editor.
This is a lot of work and the problem with this method is that if you wanted to change something, then you will have to manually do that.
That’s where widgets come in.
In web development terminology widgets are non-content blocks that you can add to different areas of your website separate from the main content area.
WordPress comes with a set of built-in widgets that you can add to any widget-ready areas provided by your WordPress theme.
All popular WordPress themes come with common widget ready areas like sidebars, footer, header widget areas. However, very few WordPress themes include an after-post widget area.
That being said, let’s take a look at how you can easily add after-post widgets in WordPress regardless of which WordPress theme you are using.
Method 1. Adding After Post Content using a Plugin
This method is a bit limited but easier and works with all types of WordPress widgets. It relies a little bit on your WordPress theme for styling but would work well for most users.
First thing you need to do is install and activate the Add Widget After Content plugin. For more details, see our step by step guide on how to install a WordPress plugin.
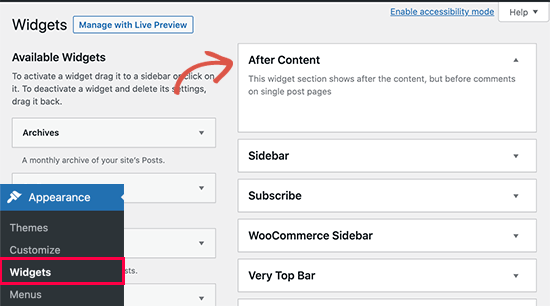
Upon activation, go to the Appearance » Widgets page and there you’ll notice a new widget area called ‘After Content’.
Now you can simply add any widget from the available widgets column into the After Content area. For instance, here we have added Recent Posts, and a newsletter sign up form widget we made using WPForms.
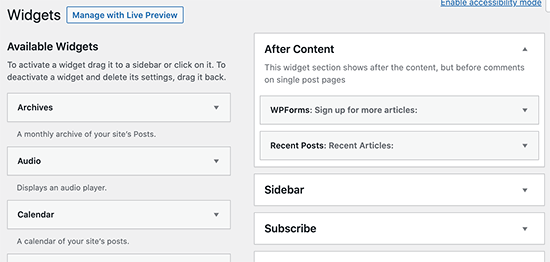
Feel free to edit each widget setting as you would normally do and don’t forget to save your changes.
Once, finished you can visit your website to see your after post content widgets in action. This is how it looked on our demo website.
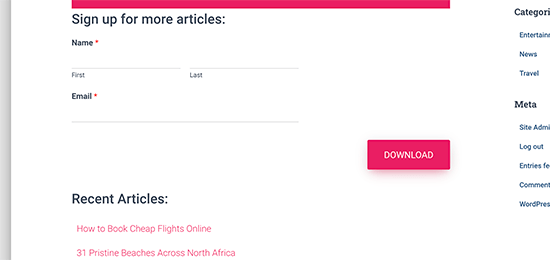
Depending on how many widgets you are trying to add and your WordPress theme, your widgets may appear slightly off balanced.
By default, the plugin adds widgets one after another, so if you wanted to show them side by side, then you’ll have to use custom CSS. You can also change background color, add padding, change text color, and more.
Simply go to Appearance » Customize page and switch to the Additional CSS tab. You can start off by adding this custom CSS as a starting point.
.awac.widget {
    width: 50%;
    display: inline-block;
    float: left;
    padding: 20px;
    background-color: #fff8e9;
    border: 1px dashed #fde2a9;
    min-height:400px;
}

.awac.widget h4 {
font-size:18px;
color:#666;
}

.awac.widget li{
font-size:16px;
}
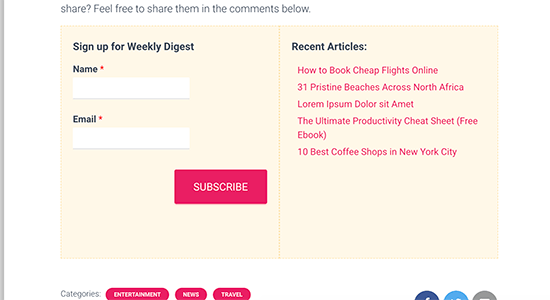
In this custom CSS code, we changed the widget width to display two widgets side by side. We have also changed background color and font sizes. Feel free to adjust the CSS to meet your requirements.
Don’t forget to click on the Publish button to save your changes.
This is how it looked on our demo website.
Don’t want to use custom CSS? Try the CSS Hero plugin. It lets you customize all areas of your site without any CSS knowledge.
Show or Hide After Post Widgets
By default, the plugin will show your after post widgets on all posts and pages. It also allows you to hide it on places where you don’t want to show after content widgets.
For instance, you may not want to display after post widgets on static pages.
Simply go to the Appearance » Widget After Content page. From here, you can choose which categories or post types will not display your after-content widget.
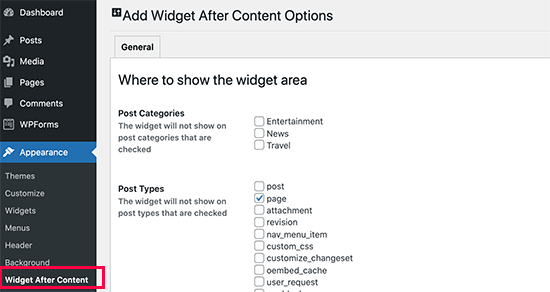
Don’t forget to click on the Save Changes button to store your settings.
You can also hide the after content widget area for individual posts and pages. Simply edit the post of page where you don’t want to show after post widgets and scroll down to the ‘Widget After Content’ box at the bottom.
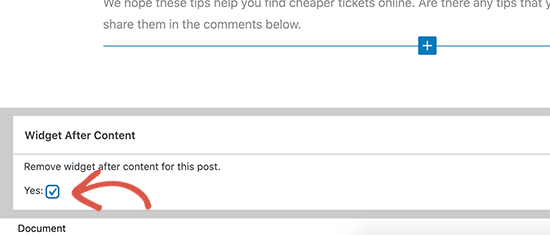
Next, check the box to hide the widget area and then save your post or page. The plugin will now stop showing the widget area for that particular post/page.
Method 2. Adding After Post Content using OptinMonster
This method is prettier and more powerful, but it does not use default WordPress widgets. Instead, it allows you to add any content you want with beautiful designs and templates to choose from.
Another advantage of this method is that it gives you a ton of targeting options. For instance, you can show personalized content to different users, change content based on what users are currently viewing, or use on-site retargeting for more impact.
For this method, you’ll need OptinMonster. It is the best lead generation and conversion optimization software on the market and allows you to convert website visitors into subscribers and customers.
First, you need to sign up for an OptinMonster account.
After signing up, switch to your WordPress website to install and activate the OptinMonster plugin. For more details, see our step by step guide on how to install a WordPress plugin.
This plugin acts as a connector between your WordPress website and your OptinMonster account.
Upon activation, you need to visit OptinMonster » Settings page and click on the ‘Connect existing account’ button.
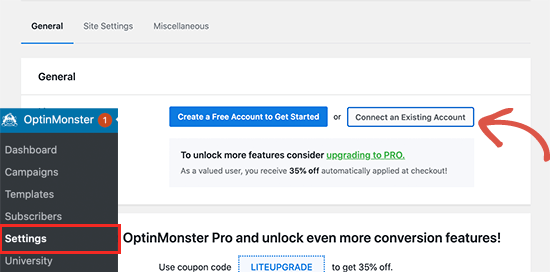
This will bring up a popup where you can log in and connect your WordPress site to your OptinMonster account.
Now that your WordPress site is connected, you are ready to create your first geotargeted campaign. Go to the OptinMonster » Campaigns page and click on the ‘Add New’ button.
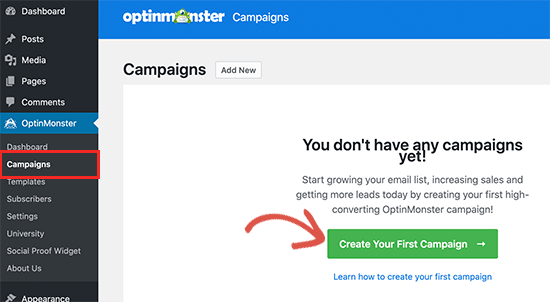
First, you’ll need to choose your campaign type. OptinMonster supports lightbox popups, floating bars, inline optins, fullscreen, slide-in, and gamified campaigns.
For the sake of this tutorial, we’ll choose a inline campaign which allows us to automatically display our campaign after content.
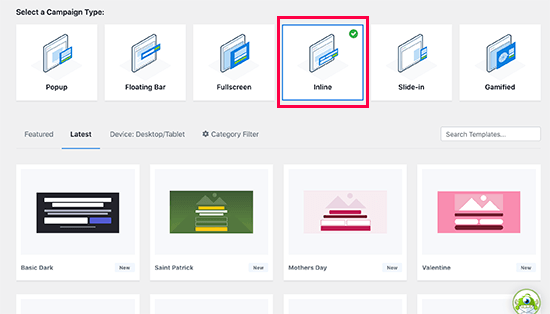
Below that, you can select a campaign template by clicking on it.
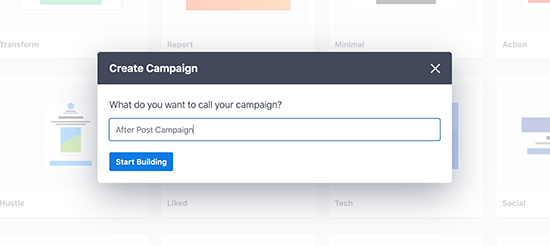
Next, you need to enter a name for your campaign. You can enter any name here, and then click on the ‘Start building’ button.
This will launch OptinMonster’s campaign builder interface with a live preview of your campaign in the right panel.
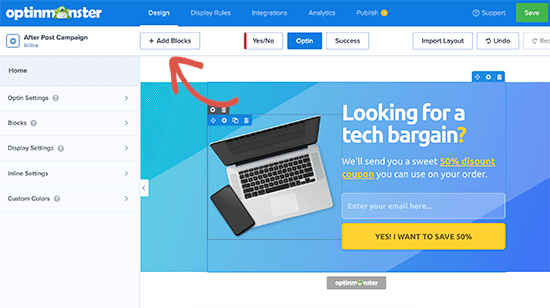
You can simply point and click on any item in the preview to edit, move, or delete it. You can also add new elements by clicking on the Add Blocks button at the top.
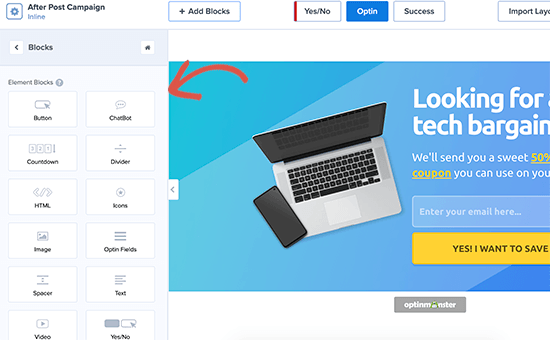
From here, you can choose more powerful elements not available in the default WordPress widgets. For instance, you can add countdown timers, buttons, chatbots, and columns.
Once you have designed your after post campaign, switch to the Publish tab and change the campaign status to ‘Publish’.
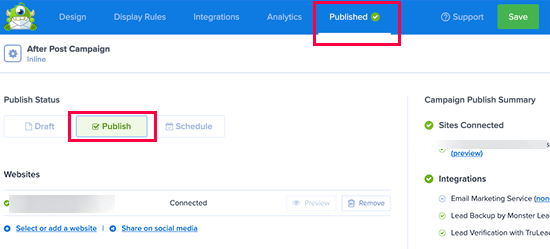
After that, click on the Save button to store your settings and close the campaign builder.
OptinMonster will now take you to the Output settings page. From here, you can choose where you want to display your after post content.
Simply select Automatic and then you can choose to show your campaign inside, below, or before the post content.
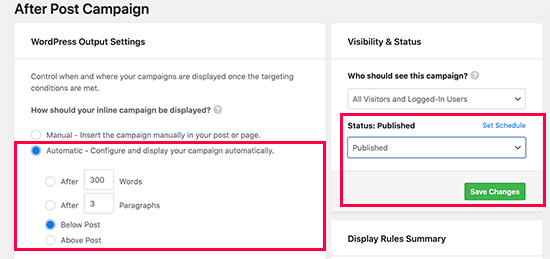
For the sake of this tutorial, we’ll choose below the post content option. After that, change the Visibility status to Published and click on the Save button to make your campaign live.
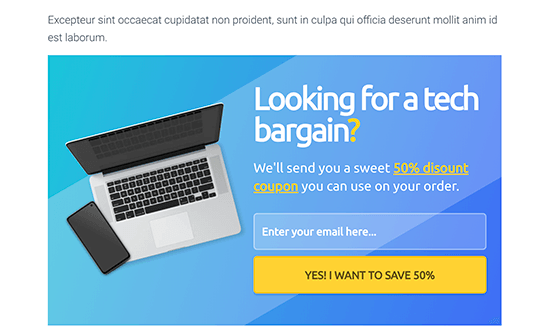
You can now visit your website to see your custom after post widget in action.
We hope this article helped you learn how to add custom after post widgets in WordPress.
Want to see how users are interacting with your after post widgets? See our tutorial on how to track user engagement in WordPress and then try these tips to easily boost your website traffic.
If you liked this article, then please subscribe to our YouTube Channel for WordPress video tutorials. You can also find us on Twitter and Facebook.
The post How to Add Custom After Post Widgets in WordPress appeared first on WPBeginner.

