Recently one of our readers asked if it was possible to create chat rooms on your WordPress site for your users?
A chat room hosted on your site will allows your visitors to chat with each other without needing to install a third-party chat client like Slack or Discord.
In this article, we’ll show you how to create a chat room in WordPress.
Why Add a Chat Room in WordPress?
If you run a small membership website or an online forum, then you may want to add instant messaging chat room for your users.
Normally, you can use third-party services like Slack, WhatsApp, Facebook groups, Discord, etc. But the downside is that all the communication will happen outside your website.
An on-site chat room can make your small community come alive and allow users to talk to each other without leaving your website.
Note: These chat rooms are for small community of users. If you are looking for live chat for customer support, then check out our list of best live chat support software.
That being said, let’s take a look at how to easily add a chat room to your WordPress site.
Adding Chat Rooms in WordPress
First, you’ll need to install and activate the Simple Ajax Chat plugin. For more details, see our guide on how to install a WordPress plugin.
Once you’ve activated the plugin, simply go to the Settings » Simple Ajax Chat page to set up your chat room.
You need to go to the Plugin Settings section and change the name of your chat under ‘General Settings.’ We called it ‘My Chat Room’ for this example.
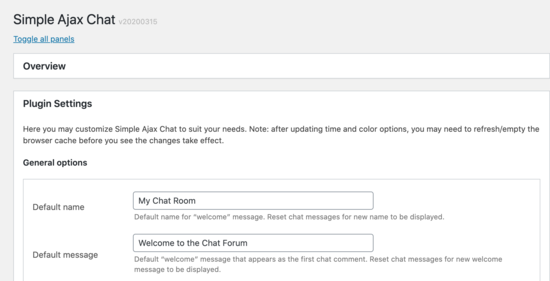
Under general settings, there are a bunch of options that you can use to customize your chat room.
For instance, you can require users to be logged in to use the chat feature. Or they can use their logged-in username as their chat name, and more.
You can also customize the appearance of your chat room and even manage banned words and phrases if you want to.
How to Display Your Chat Room in WordPress
The next step is to create the page where you want your chat room to live. On the settings page, scroll down to the “Shortcode & Template Tag” area and click to open it.
You’ll see the shortcode that you need to copy:
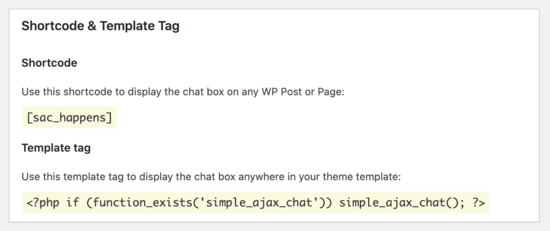
Next, go to Pages » Add New in your WordPress admin, and name your page.
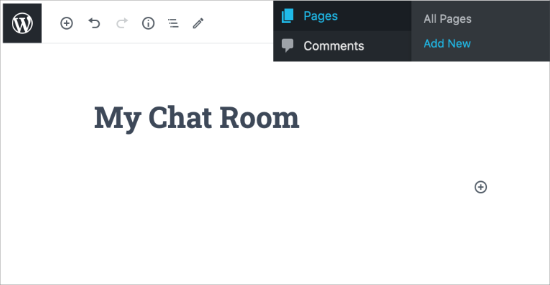
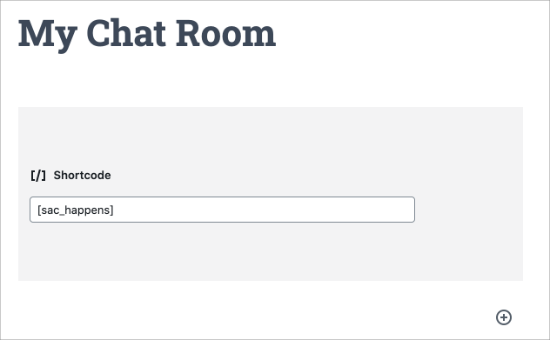
After that, you can add the shortcode ‘[sac_happens]’ to display your chat room.
To add the shortcode, first you’ll need to click the circle with the ‘+’ sign in the upper left corner of the WordPress block editor. Next, type in ‘short’, and you’ll see the shortcode option.
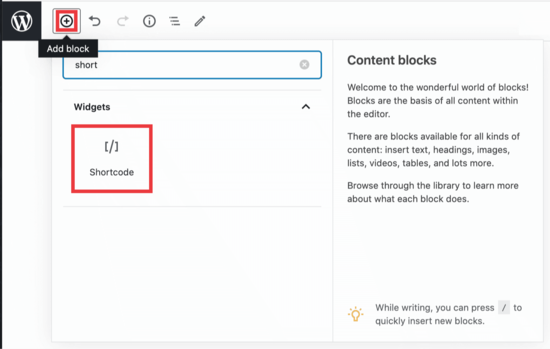
Click the shortcode button to add it to your page and then paste the shortcode ‘[sac_happens]’ into that area.
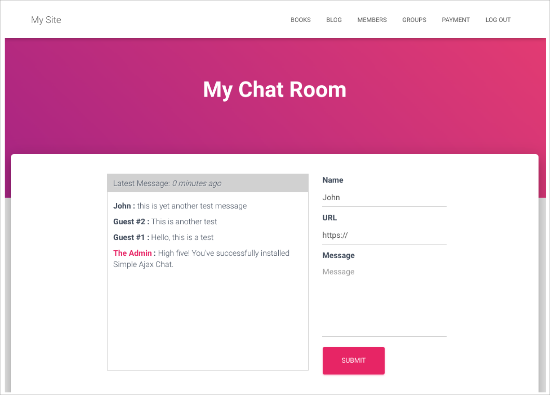
Now you can click the Publish button to save your changes. After that, go ahed and check out your page to see your live chat room in action. This is how it looked on our test site.
We hope this article helped you learn how to create chat rooms using WordPress for users. You might also want to see our guide on the best chatbot software, and how to add web push notifications in WordPress to connect with your visitors after they leave your site.
If you liked this article, then please subscribe to our YouTube Channel for WordPress video tutorials. You can also find us on Twitter and Facebook.
The post How to Create Chat Rooms in WordPress for Your Users appeared first on WPBeginner.
Source: https://www.wpbeginner.com/feed
