Recently, a reader asked how to add a request a quote form in WordPress?
A request a quote form allows potential customers to contact you to get a pricing information for your product or service. This is particularly helpful for businesses that offer varied pricing based on a customer’s requirements.
In this article, we’ll show you how to easily create a request a quote form in WordPress to generate more leads from your website.

What is a Request a Quote Form and Why Create One in WordPress?
A ‘Requet a Quote’ form allows your customers to contact you with their specific information to get pricing based on their requirements.
For instance, if you provide gardening services, then your rates may vary depending on lawn size, job type, and time. Similarly, if you sell products in bulk, then you may be able to adjust pricing based on customer’s order.
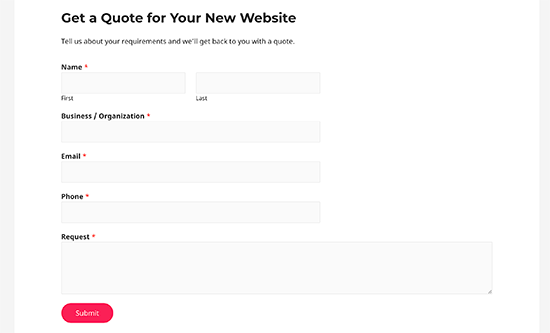
Request a quote form basically allows you to collect all the customer information you need to offer them accurate pricing for the job.
Quote request forms typically see higher conversions because users don’t need to enter payment details right away. This helps you generate more leads and make more sales.
That being said, let’s take a look at how to easily create a request a quote form in WordPress.
Creating a Request a Quote Form in WordPress
For this tutorial we’ll be using the WPForms, which is the best WordPress contact form plugin on the market.
It allows you to easily make any kind of form using a simple drag and drop form builder, right inside your WordPress site.
First, you need to install and activate the WPForms plugin. For more details, see our step by step guide on how to install a WordPress plugin.
Note: you can use the free version of WPForms as well to create this form.
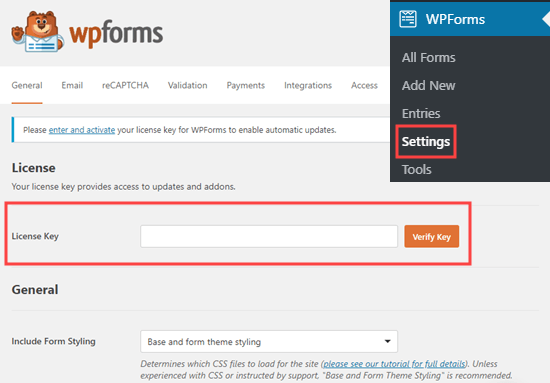
Upon activation, go to WPForms » Settings to enter your license key. You can find this information under your account on WPForms website.
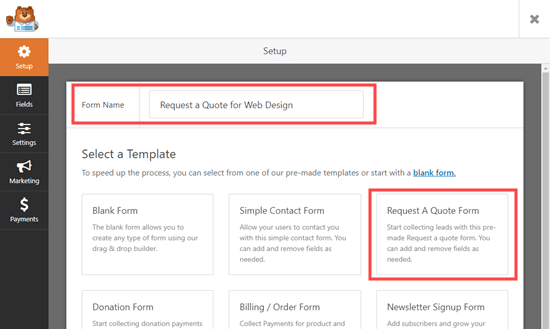
Next, go to WPForms » Add New to launch the WPForms form builder. You need to give your form a name and click on the ‘Request a Quote’ template.
You will then see the drag and drop form builder with the default Request a Quote template in place.
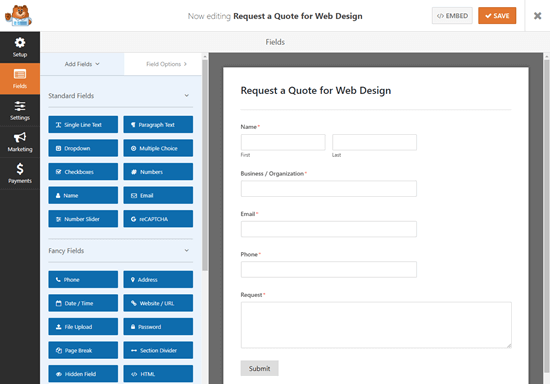
Now, you can go ahead and edit the fields on your form. For our demo form, we changed the ‘Name’ field to a simple format, and we changed the ‘Request’ field label to something more specific.
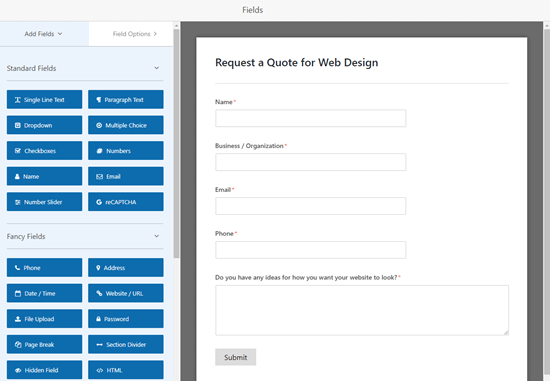
You can easily add or remove fields on your form by simply clicking on the Add Fields tab, and then drag and drop your chosen field onto your form.
We’ve added a checkboxes field, so users can choose what elements they want for their website.
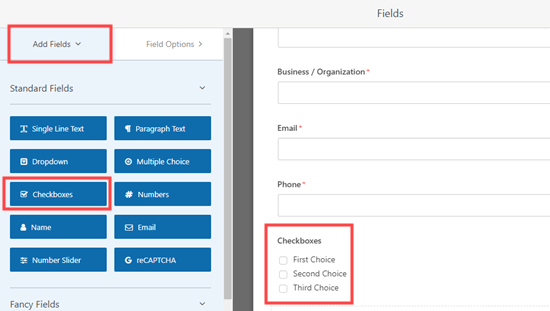
To edit the new field, just click on it. The field options will open up on the left-hand side of the screen.
Here, you just need to type in the text that you want to use for the field label and options.
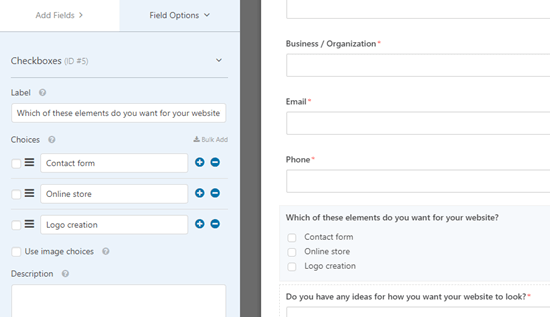
You can also add or remove options using the + and – buttons.
Once you’ve finished creating your form, don’t forget to click the Save button at the top of the screen to save your changes.

Adding Your Request a Quote Form to Your Website
Now, that you have created your Request a Quote form, it is time to add it to your WordPress website.
First, you need to either create a new page or edit an existing one where you want to add your form.
Next, you need to click the + button to add a WPForms block using the WordPress block editor.
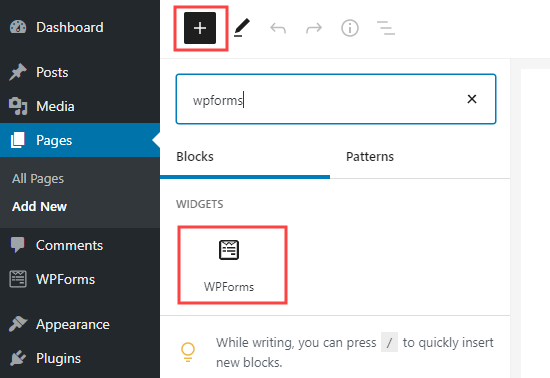
Once the block is added, you need to choose your form in the dropdown. After that go ahead and publish the page.
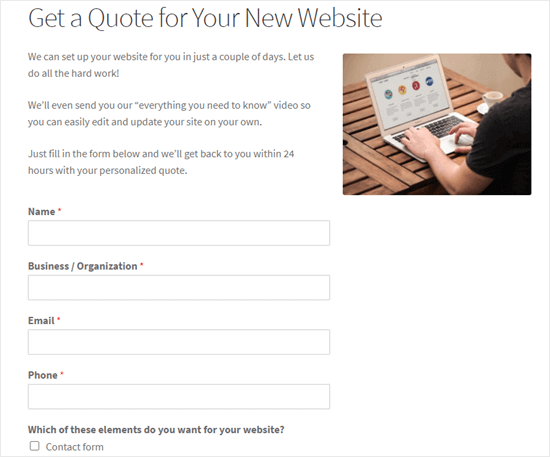
Next, you can preview the page to see how your form looks. Here’s how the request a quote form looked on our demo website:
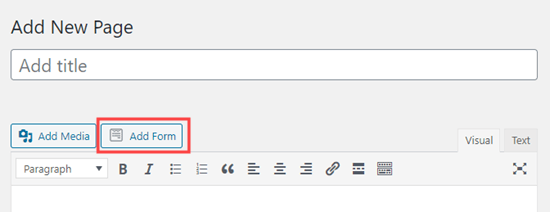
Tip: If you’re using the classic editor, it’s easy to add your form using the Add Form button. It’s next to the Add Media button.
Changing the Confirmation Message and Notifications for Your Form
When a potential customer requests a quote, they’ll see the default confirmation message: ‘Thanks for contacting us! We will be in touch with you shortly.’
You can easily change this confirmation message. To do so, simply go to the WPForms » All Forms page in your WordPress admin, then click on the title of your form to edit it.
Next, click the Settings » Confirmations tab of your form.
You will see a confirmation message box where you can edit and customize the default message.
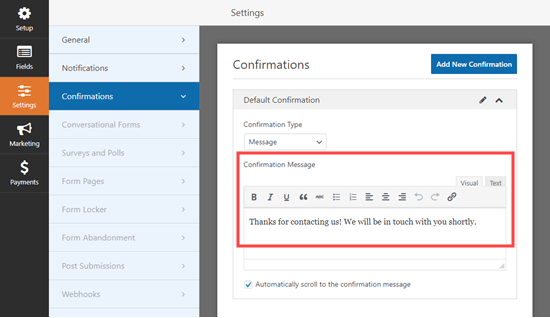
Don’t forget to click the Save button at the top of the screen after making changes.
You can also change the notification message sent by your form. To do this, click on the Notification tab. It’s easy to change things like your email subject line and who receives the emails.
The ‘Send To Email Address’ defaults to {admin_email}. You can change this admin email in your WordPress settings.

Tip: If you’re not getting emails from your form, then you may need to use our instructions to fix WordPress not sending emails issue.
You could even send multiple notifications from your form. This lets you send an email to your customer to automatically confirm the details of what they’ve requested.
We hope this article helped you learn how to create a request a quote form in WordPress. You might also like our article on the best WordPress plugins for business websites.
Bonus: Get More Leads by Offering Free Quote
WPForms makes it super easy to create a request a quote form. However, you may need to give your customers a nudge into the right direction to fill in the form.
This is where OptinMonster comes in. It is the best lead generation and conversion optimization software on the market.

It helps you convert more users by nudging them to perform the desired action like filling out a form, joining your email list, buying a product.
It comes with beautiful popups, powerful on-site targeting, countdown timers, floating bars, and more. All of them help you bring in more leads and customers to grow your business.
We hope this article helped you learn how to create a request a quote form in WordPress. You may also want to see our comparison of the best business phone services to auto-redirect customer calls to boost sales, and our comparison of the best email marketing services to automatically send follow-up emails after someone requests a quote.
If you liked this article, then please subscribe to our YouTube Channel for WordPress video tutorials. You can also find us on Twitter and Facebook.
The post How to Create a Request a Quote Form in WordPress (Step by Step) appeared first on WPBeginner.
Source: https://www.wpbeginner.com/feed

brimonidine tartrate combigan eye drops