Do you want to try WordPress for free without buying domain name or hosting?
Normally, you need a domain name and hosting to build a WordPress website. However, many users may want to give it a try before spending money.
In this article, we’ll show you multiple ways to try WordPress for free without domain or hosting. We’ll also talk about things to try in WordPress and making a live website.
Why Try WordPress for Free without Domain or Hosting?
Normally, you need a domain name and a hosting account to make a WordPress website.
A domain name usually costs $14.99 per year (often non-refundable) and web hosting starts at $7.99 per month (usually paid yearly).
Now that’s a significant amount of money if all you want is to try WordPress.
Unfortunately, the WordPress.org website doesn’t offer any free WordPress trial.
Luckily, there are still plenty of ways to try WordPress for free without buying a domain name or signing up for a hosting account.
Let’s take a look at some of the easiest ways to try self-hosted WordPress.org for free (no domain or hosting account needed).
- Try WordPress Online with a Full Refund (unrestricted but requires credit card payment upfront)
- Try WordPress for Free on Your Computer (unlimited free WordPress development)
- Try WordPress with WordPress.com (modified WordPress experience with limited functionality)
- Things to Try in Your Free WordPress Demo
- Launching Your WordPress Website
1. Try WordPress Online with Full Refund on Hosting
The easiest way to try WordPress online is by using a a WordPress hosting company that offers a risk-free money back guarantee (i.e full refund for up to 30 days or even 90 days in some cases).
The benefit of this method is that you get to try WordPress for building your website. If you like it, then you can make your website online with a single click (no extra work needed).
And if you don’t like it, then you can request a full refund from your WordPress hosting company.
For this method, you’ll need a credit card to pay for the WordPress hosting upfront, but if you don’t like it, then you can get a full refund.
Here are some of the largest WordPress hosting companies that offer a full refund policy:
- Bluehost – offers free domain + web hosting with 30 day money back guarantee.
- Hostinger – offers free domain + web hosting with a 30 day refund policy.
- SiteGround – offers cloud WordPress hosting with risk-free 30 day refund policy.
- Dreamhost – offers free domain + WordPress hosting with 97 day refund policy.
All of the above hosting companies come with WordPress pre-installed, or they offer 1-click WordPress setup option.
You can quickly get started with any of them to try WordPress online risk free.
For the sake of this tutorial, we will show a step by step process on what this looks like with Bluehost which is one of the top WordPress recommended hosting provider.
First, you need to visit the Bluehost website and click on the green ‘Get Started Now’ button.

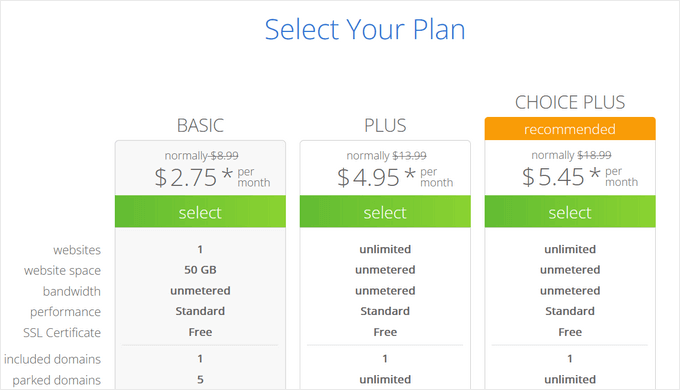
Next, you’ll be asked to choose a plan.
We recommend starting with Basic since you just want to try WordPress. You can always upgrade your hosting plan if you decide to stay on Bluehost.
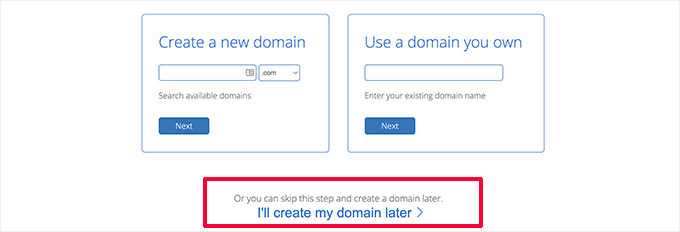
Now you’ll be asked to choose a domain name. Bluehost is currently offering WPBeginner users a free domain name and 72% discount using our Bluehost coupon .
However, if you register a domain name, then the company will deduct the domain cost when you ask for a refund. You need to click on ‘I’ll create my domain later’ option at the bottom to skip this step, so you qualify for a full refund.
Next, you’ll be asked to provide personal details and finalize the hosting package.
It is important that you uncheck all optional extra addons on this page.
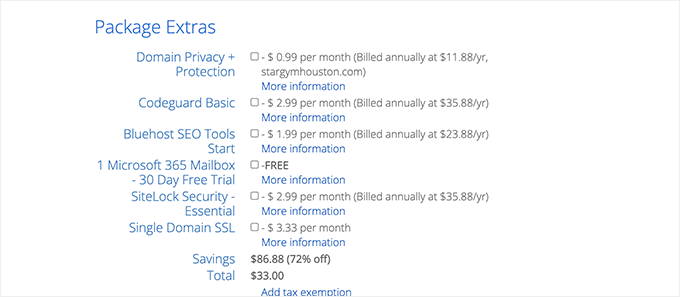
Addon costs are non-refundable, and you are only eligible for the full refund of your hosting bill, not addons.
Lastly, you need to enter your payment information to complete the purchase.
Bluehost will now create your hosting account and will send you an email with instructions on how to access your hosting control panel.
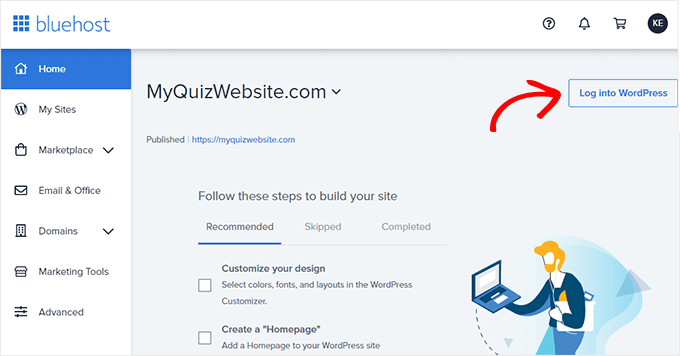
From your hosting control panel, you’ll notice that Bluehost has already installed WordPress for you. You can simply click on the log into WordPress button to access your website.
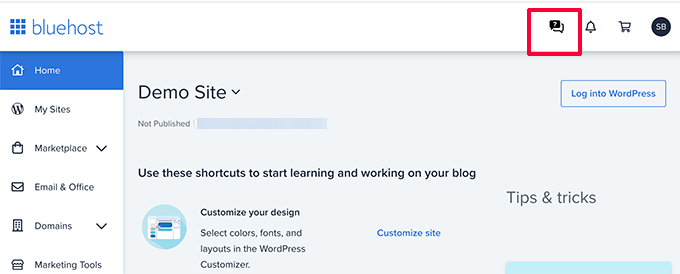
Requesting Refund on Bluehost
Login to your Bluehost account dashboard and click on the Support icon. From there, you need to scroll down to the contact section and start a live chat session.
Once connected to a live chat agent, you can request them to issue a full refund and cancel your account.
Important: If you’re using a hosting company that’s not mentioned above, then please make sure to read and fully understand their refund policy before making a purchase. If in doubt, reach out to the hosting company by dropping them an email.
2. Try WordPress on Your Computer
Another popular way to try WordPress is by installing it on your computer. This is what many expert developers do for client websites.
This method allows you to try WordPress for free without buying any domain or hosting. You can install plugins, themes, and make a complete website on your own computer.
The downside is that your website is limited to your own computer and not publicly viewable over the internet, but you can always make your local website online using our tutorial later.
There are several amazing free software available that allow you to set all this up on your computer.
The easiest of them all is called Local. It allows you to easily set up a local WordPress development environment on your computer. It works on MacOS, Windows, and Linux.
Simply head over to Local website and download it for your operating system.
Depending on your operating system, the installation wizard may differ slightly. For MacOS, simply click on the downloaded package and then drag and drop Local.app to the Applications folder.
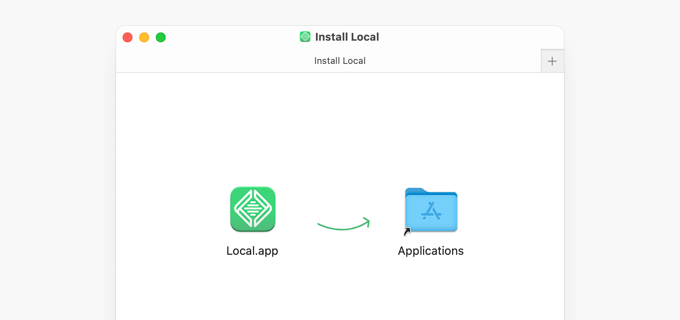
Once you have installed Local, open the app on your computer.
Then click on the ‘Create a new site’ button.
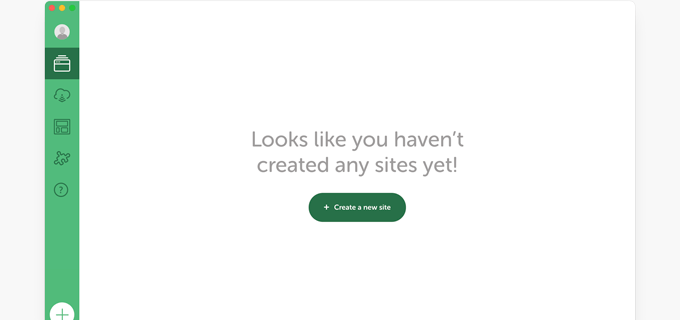
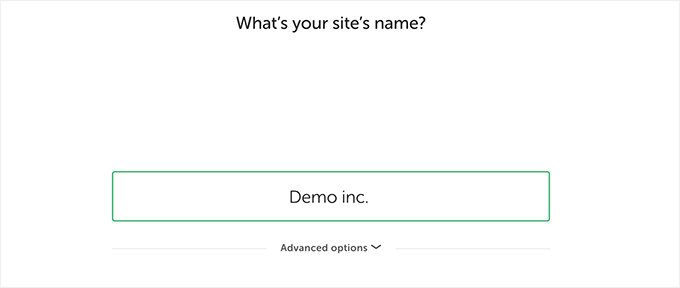
Next, you’ll be asked to provide a title for your website.
Simply enter any name you want to website for your demo site and click on the Continue button.
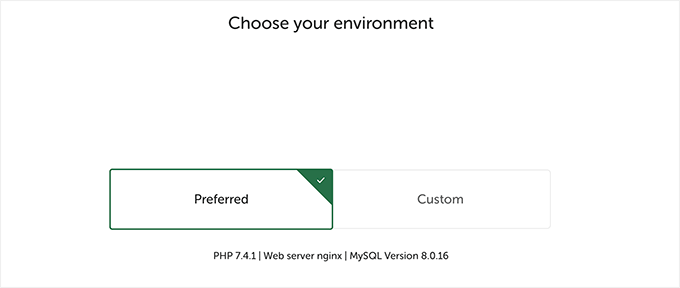
After that, you’ll be asked to choose local environment. For instance, which server software you want to use, which MySQL or PHP version to use.
If you are not sure, then you can simply use the Preferred options and click Continue.
On the next screen, you’ll be able to choose a username and password to access WordPress admin area of your local site.
You can also change the WordPress admin email, in case you need to recover your login info.
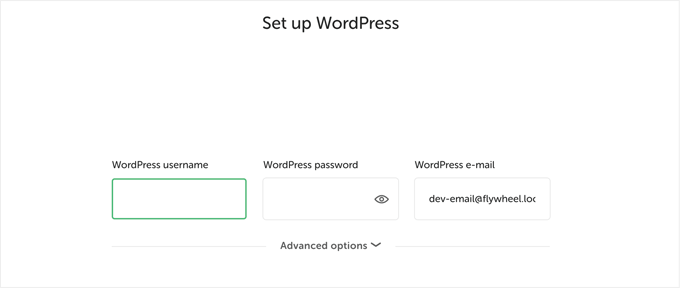
Click on the Continue button to finish the set up wizard.
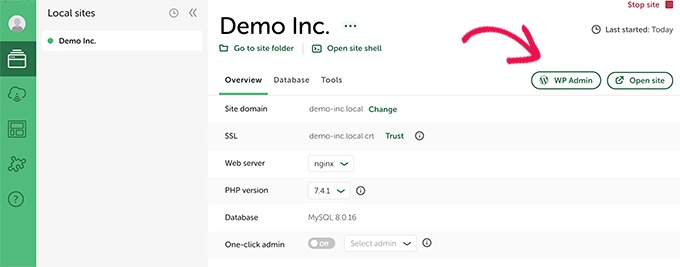
Local will now fetch and install the latest version of WordPress and create a new local website for you.
Once finished, you’ll see your local website details. From here, you can click on the WP Admin button to access WordPress dashboard.
If for some reason Local doesn’t work, or you simply want to try an alternative, then you can check out MAMP (for MacOS) or WAMP (for Windows).
3. Try WordPress with WordPress.com (No Domain Needed)
Another option that you’ll often come across for trying WordPress is WordPress.com.
Before you do that, it is important that you understand how WordPress.com is different from a self-hosted WordPress.org website.
WordPress.com is a website hosting company and a publishing platform. Basically, you don’t need to install WordPress or take care of any website maintenance.
The downside is that you don’t get full control over the software running in the background. This takes away the flexibility and freedom.
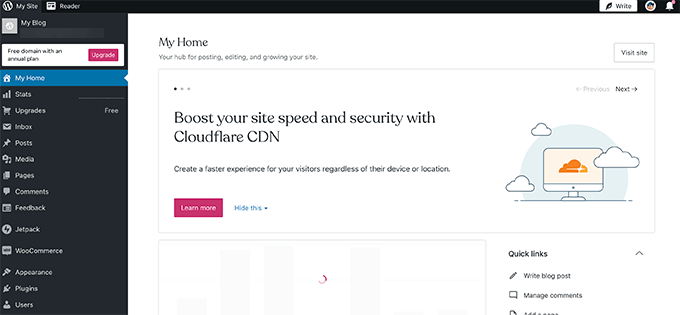
WordPress.com have a limited free plan that you can try. However, it will be missing many features of a self-hosted WordPress.org website.
For more on this topic, see our detailed guide on the differences between WordPress.com vs WordPress.org.
In the recent years, WordPress.com has added a Pro plan that lets you install plugins and themes, but it is far more expensive than other WordPress hosting options that we have shared above.
Things You May Want to Try in WordPress
Now that you have created a free WordPress website, you are probably wondering which things you should try.
1. Creating Content in WordPress
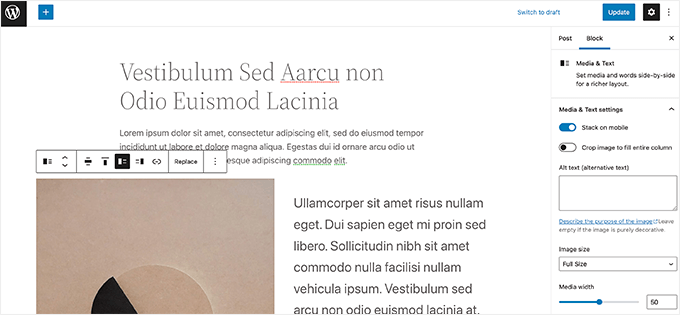
We recommend you start with creating blog posts and making some must have pages for your website.
2. Choosing a Website Design
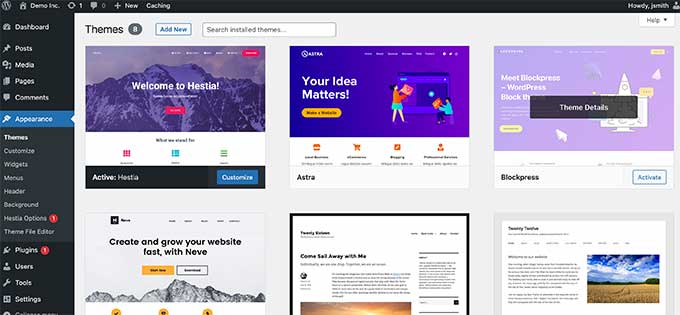
After that, you may want to choose a design for your website. There are so many free and paid WordPress themes that you can use. We recommend picking up a free theme and customizing it to make your own.
You can even install a free page builder plugin like SeedProd to experience designing your website with a drag & drop interface.
3. Exploring WordPress Plugins
The real power of WordPress comes from WordPress plugins. These are like apps for your WordPress website and allow you to extend website functionality by adding new features.
There are over 60,000+ free WordPress plugins available.
Following are a few must have WordPress plugins that you should try.
1. WPForms – It allows you to add a beautiful contact form or survey to your website. There is a WPForms Lite version that you can try for free.
2. All in One SEO for WordPress – It is the best WordPress SEO plugin on the market and helps you optimize your website for search engines. There is also a AIOSEO free version that you can try.
3. SmashBalloon – It is the best WordPress social media plugin that allows you to display content from your social media accounts in beautiful galleries and layouts. There is a free version of Smash Ballon for Instagram feed, Facebook feed, Twitter feed, and YouTube feed.
Need more plugin suggestions? See our full list of essential WordPress plugins that you can try on your free WordPress demo.
4. Learning WordPress Basics
Now if you are struggling finding your way around WordPress or just want to cover WordPress basics, then you can learn WordPress for free right here.
WPBeginner is the world’s largest WordPress resource site for beginners. We have been around since 2009 and have a massive library of resources for beginners.
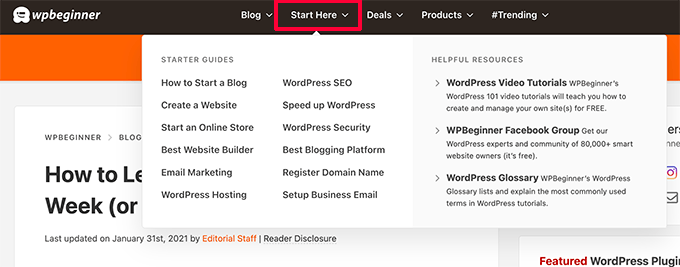
The best place to start, would be our page on how to learn WordPress for free. There, you’ll find a step by step WordPress program divided into seven days of training.
You can also start with our free WordPress video series. That’s also a step by step program for beginners.
Once you have covered the basics, you can continue exploring WordPress Tutorials, check out WordPress glossary, or subscribe to our YouTube channel for a regular installment of WordPress tips, tricks, and how-tos.
Launching Your WordPress Website
Once you have tried WordPress, you may want to officially launch a live WordPress website.
To do that, you’ll need a domain name and a hosting account.
We recommend using Bluehost. They are the largest WordPress hosting companies and have agreed to offer WPBeginner users free domain name and a generous discount on hosting.
Once you have signed up, you can follow our step by step instructions on how to make a website.
Now, some of you may want to move the site you created on your free WordPress trial to your new website.
Simply follow our guide on how to move your WordPress site to new host. We’ll walk you through migrating your WordPress website.
We hope this article helped you learn how to try WordPress for free without domain name. You may also want to see our comparison of the best website builders on the market, or see our guide on how to add create an online store and start selling.
If you liked this article, then please subscribe to our YouTube Channel for WordPress video tutorials. You can also find us on Twitter and Facebook.
The post How to Try WordPress for Free Without a Domain or Hosting first appeared on WPBeginner.
